Hey there! I'm a supplier of Laboratory Island Benches, and today I'm gonna walk you through the process of assembling one. Whether you're setting up a new lab or upgrading an old one, getting your island bench together right is super important.
Getting Ready
First things first, you gotta make sure you've got all the parts. When you order a Laboratory Island Bench from us, we send everything you need in a well - organized package. But still, it's a good idea to do a quick check. Look for the main bench top, the support legs, the connectors, and any additional accessories like drawers or shelves.
Before you start assembling, pick a good spot in your lab. You want a flat and level surface. Uneven floors can make your bench wobbly, and that's no good for any lab work. Also, make sure there's enough space around the area. You don't want to be cramped while you're putting the bench together.
Assembling the Frame
Let's start with the frame. The support legs are the foundation of your bench. Usually, they come with pre - drilled holes for easy assembly. Take two legs and connect them using the provided connectors. These connectors are designed to fit snugly, so you might need to give them a little push. Make sure the legs are perpendicular to each other. You can use a level to double - check.
Once you've got two pairs of connected legs, it's time to join them to form the base of the frame. Connect the pairs at the corners using more connectors. This step is crucial because it determines the stability of your bench. Tighten all the screws properly, but don't over - tighten them as it might damage the parts.
Attaching the Bench Top
Now that the frame is ready, it's time to put on the bench top. The bench top is usually quite heavy, so it's a good idea to have a couple of friends help you lift it. Place the bench top carefully on the frame, aligning it with the edges. There are usually holes on the bench top that match the ones on the frame. Use the screws provided to attach the bench top to the frame. Start by screwing in the corner screws, and then work your way around.
As you're screwing, make sure the bench top is level. You can adjust the height of the legs slightly if needed. A level bench top is essential for accurate lab work.
Adding Drawers and Shelves
If your Laboratory Island Bench comes with drawers or shelves, this is the time to install them. Most drawers and shelves are designed to be easily slid into place. They usually have guides on the sides that fit into corresponding tracks on the bench.
For drawers, start by attaching the drawer slides to the sides of the drawer. Then, slide the drawer into the tracks on the bench. Make sure the drawer opens and closes smoothly. If it doesn't, you might need to adjust the slides a bit.
Shelves are even easier. Just place them on the support brackets inside the bench. You can adjust the height of the shelves according to your needs.


Installing Accessories
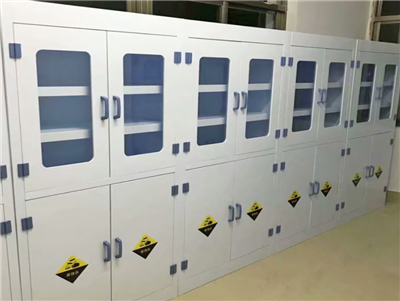
There are some cool accessories you can add to your bench. For example, a Laboratory Chemical Cabinet is a great addition for storing chemicals safely. You can mount it on the side of the bench or at the back. Just follow the installation instructions that come with the cabinet.
A Working Table in Laboratory can also be attached to the island bench. It gives you extra workspace for your experiments. And a Laboratory Reagent Rack is perfect for keeping your reagents organized. You can install it on the bench top or on the side of the bench.
Final Checks
Once you've assembled everything, it's time for a final check. Give the bench a gentle shake to make sure it's stable. Check all the drawers and shelves to ensure they open and close properly. Look for any loose screws and tighten them if necessary.
Also, make sure there are no sharp edges or rough surfaces that could cause injuries. If you find any, you can use sandpaper to smooth them out.
Why Choose Our Laboratory Island Benches
Our Laboratory Island Benches are made from high - quality materials. They're designed to be durable and can withstand the rigors of daily lab use. We offer a variety of sizes and configurations to meet your specific needs. Whether you have a small research lab or a large industrial lab, we've got the right bench for you.
And if you have any questions during the assembly process, our customer support team is always here to help. We want to make sure you have a smooth experience setting up your lab.
Contact Us for Purchasing
If you're interested in our Laboratory Island Benches or any of our other lab furniture products, don't hesitate to reach out. We're happy to discuss your requirements, provide you with a quote, and answer any questions you might have. We can help you find the perfect lab furniture solution for your space.
References
- Laboratory furniture assembly guides provided by industry standards
- Experience and knowledge from years of supplying Laboratory Island Benches